Hello everyone!
As some of you may already know from previous projects I’ve done, I like to make modifications to the car that are generally uncommon or directly nonexistent. This time, due to the low lighting and the abundance of game animals in the area where I live, I had been thinking for a while about installing an additional light point to the standard ones. After doing some research, I decided to go ahead with it.
The first step was to choose what type of light I wanted. After reviewing the market, between long-range lights and wide-angle lights, I opted for the first type. Besides that, and taking the law with a grain of salt, another essential requirement was that the light be approved, just in case, you know. So, I finally decided on the Osram SX300-SP
The second step was to find the best way to support the light bar, considering its weight and dimensions, and ensuring it did not interfere with any functionality of the car. Also, I wanted a system that would allow me to remove the support relatively easily without having to disassemble the bumper each time. The solution I came up with was to fix the bar on the top of the front “H”. So, after cutting, folding, welding, and drilling some 2 and 3 mm plates, I managed to fabricate some “ears” that protrude between the standard grille, just above the car’s logo.
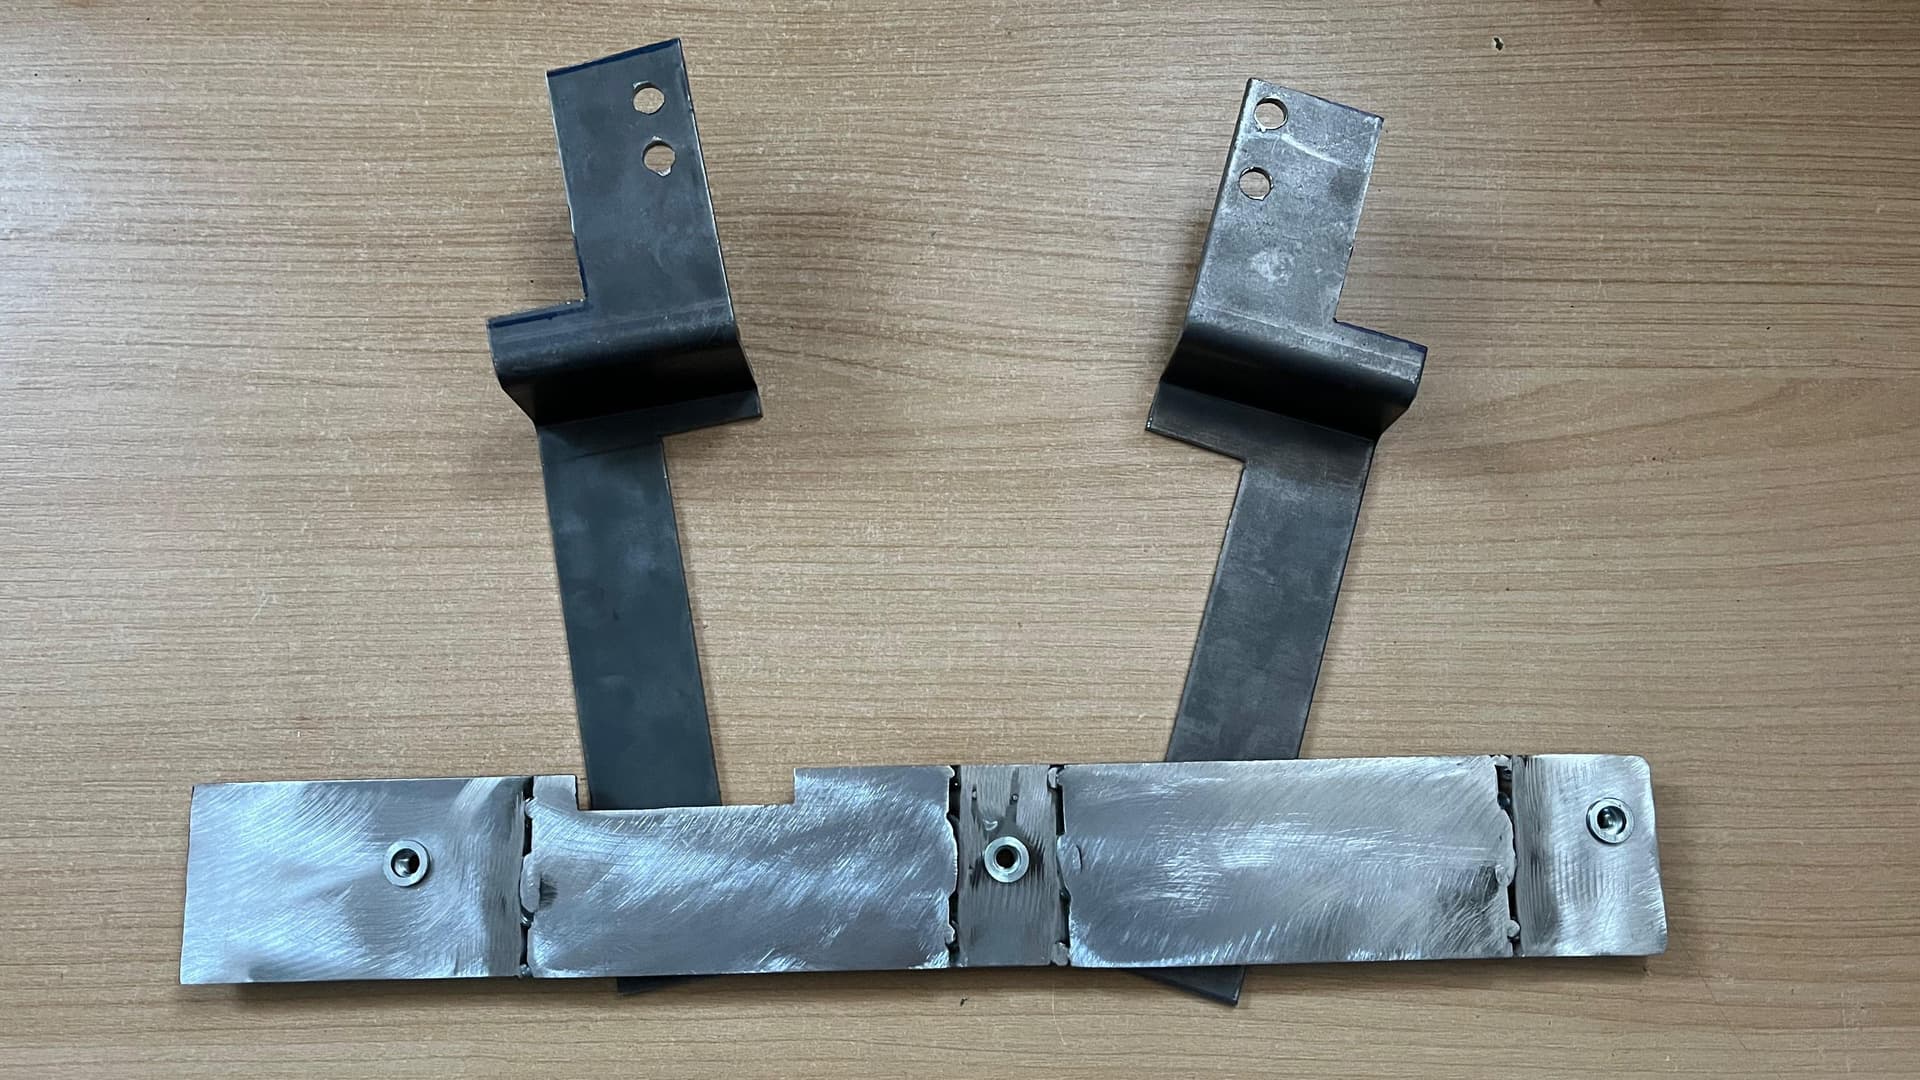
To anchor these “ears” to the car’s chassis, I took advantage of the front crossbar where the bumper is attached. This way, the riveted plate acts as a press with the ears. Thus, by simply removing the front plastic that covers the radiator and exposes the hood latch, it is possible to remove the entire support without needing to disassemble anything else.

Finally, the most tedious part for me remained: the electrical installation. After doing some research on the subject, I realized that the most practical thing was to buy the installation already made, instead of doing it myself in parts. Coincidentally, Osram has an installation for sale, and after searching on second-hand sites, I got an Osram Wire Harness AX 2LS.
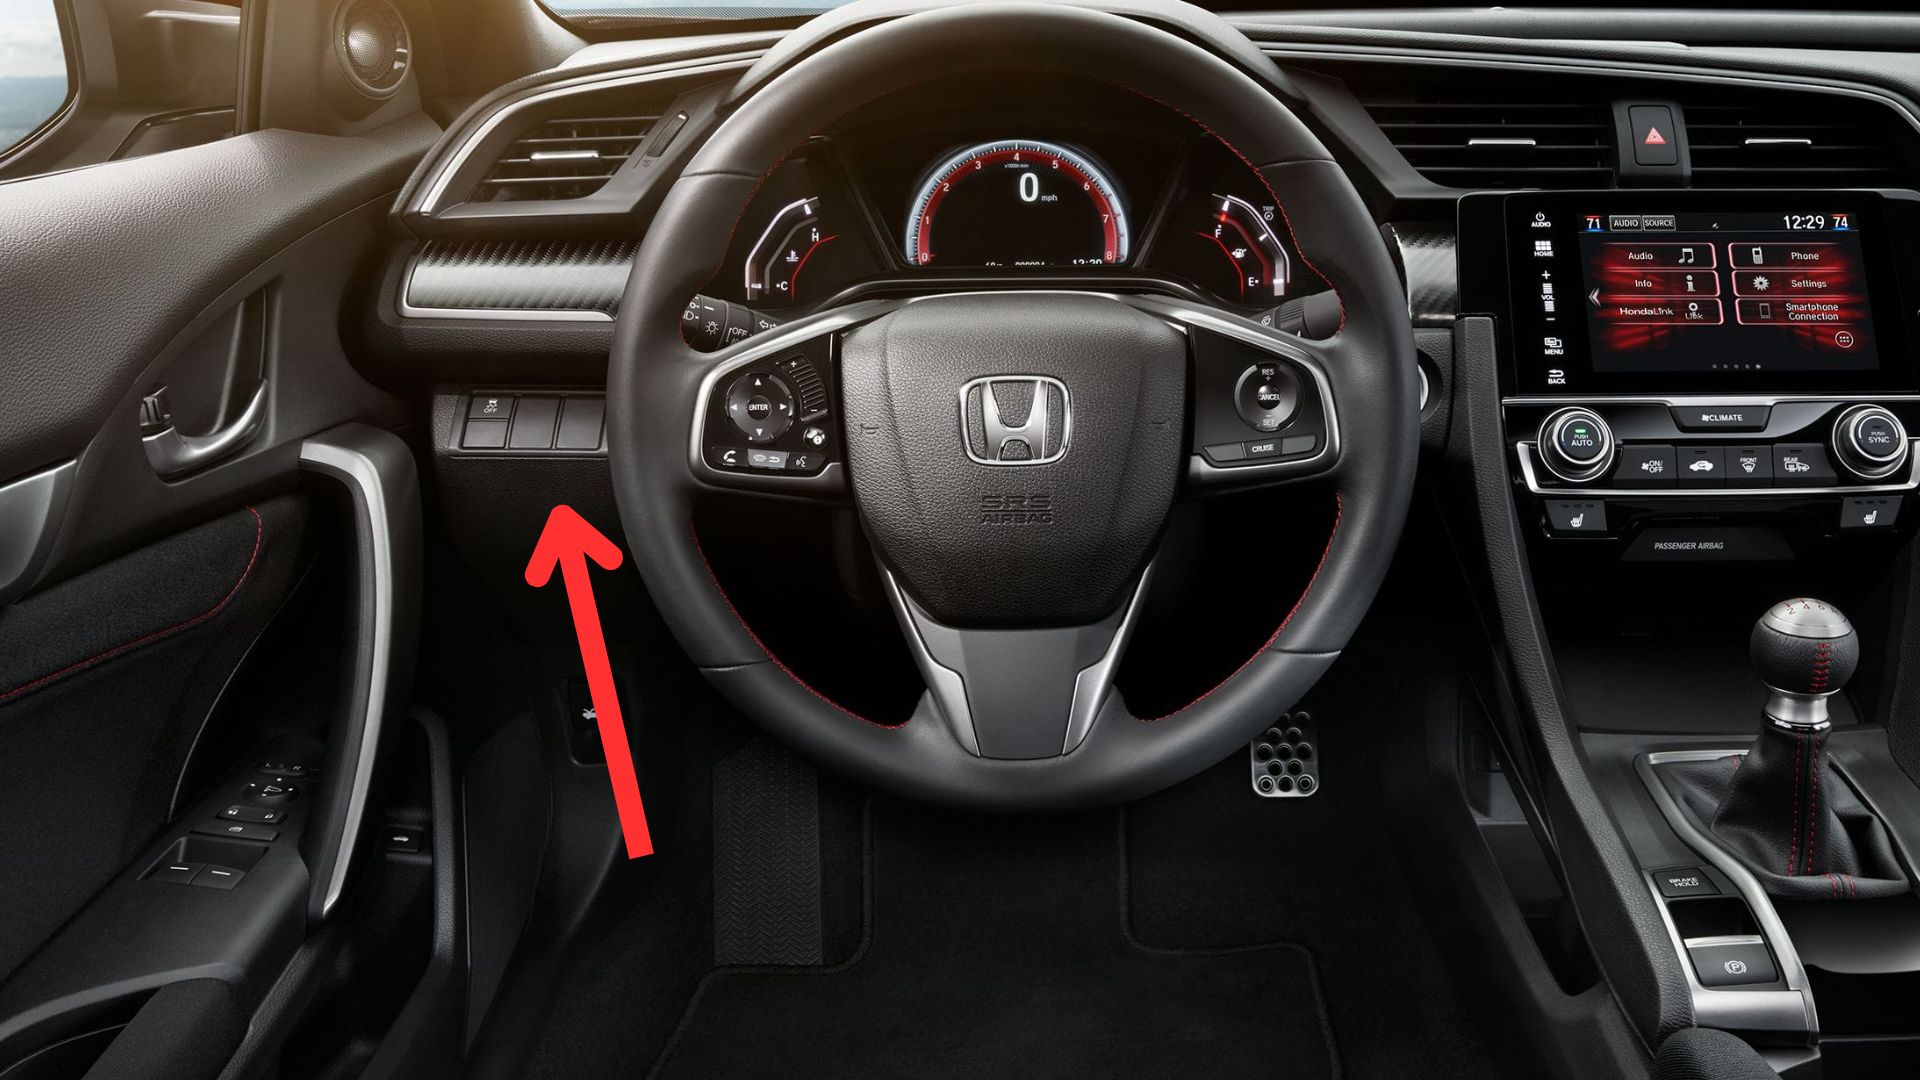
Another requirement of this project was that I didn’t want to modify or cut any panel of the car’s interior, so the only solution was to wire the power to the left button panel, which we already have as standard.
I found a backlit button panel on Aliexpress Performance, exactly the same as the standard one but “blind”. After several tests and purchases, what I finally needed were cables, terminals, a crimper, a multimeter, the Osram installation, and a 12V 40A 4-pin relay.
For the more curious, you might wonder why I use 2 relays. The explanation is that the Osram installation takes the positive and negative directly from the battery. This goes through a fuse and then reaches a relay, which manages the current flow through an ON/OFF switch that goes inside the car.
In my case, as I wanted to install the “OEM” switch, which carries direct current, an additional relay was necessary for everything to work correctly. Without this relay, the switch could not be incorporated. Additionally, I took advantage of it to give positive from the lights, so that when the low beams are on, the switch also lights up.
As always, in this type of project, when I try to explain it, I always leave things out. Anyway, I’ll leave you with the final result.